
Development Background
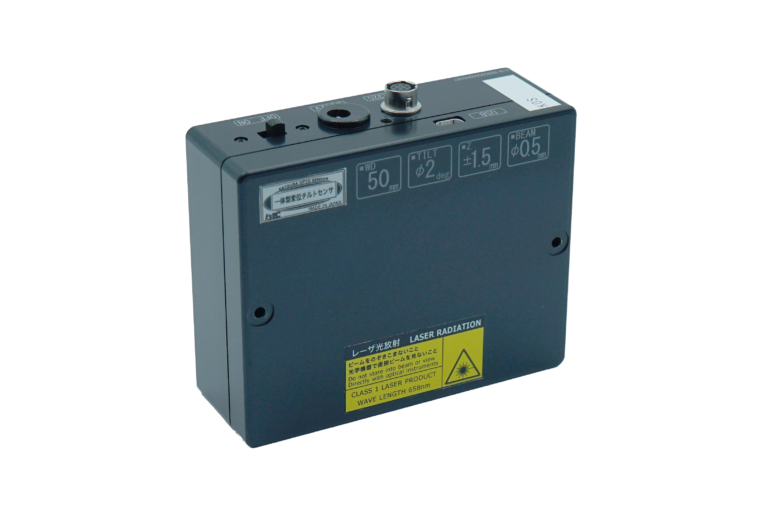
Is it possible to simultaneously measure displacement in addition to tilt measurement using the autocollimator method? The displacement tilt sensor was developed in response to such customer requests.
We have developed an easy-to-use product by integrating the sensor head and processor unit into a single unit, making it lighter and smaller, and simplifying its integration into equipment.
Features
1. Triangulation and autocollimator measurement methods in one
2. Integrated sensor and processor for even faster measurements (1K data/s)
3. Simultaneous measurement of displacement and inclination [Patent No. 5330114].
Product Information
| Item | Integrated Displacement Tilt Sensor | ||||
| Model | SH-3100 | SH-3200 | |||
| Measurement Sample | Optical plane(reflectance 80% more) | ||||
| Working Distance | 50+/-0.5mm | ||||
| Measurement Item | Tilt(ΘX,ΘY) | Displacement(Z) | Tilt(ΘX,ΘY) | Displacement(Z) | |
| Measurement Area | +/-60arcmin*1 | +/-1.5mm | +/-90arcmin*1 | +/-5mm | |
| Repeatability*2 | 0.009arcmin | 0.15μm | 0.013arcmin | 0.53μm | |
| Linearity*3 | +/-0.2% of F.S. (+/-0.24arcmin equates) |
+/-0.075% of F.S. (+/-2.25μm equates) |
+/-0.125% of F.S. (+/-0.225arcmin equates) |
+/-0.075% of F.S. (+/-7.5μm equates) |
|
| Source
Wavelength/Beam Diameter |
660+/-10nm / φ0.2mm or less | ||||
| Output Rate | 1,000 times/sec | ||||
| Size(Without protrusions) | W100 D80 H35mm | ||||
*1. Circular range.
*2. Our standard sample use and setting on WD, 6σ when measured at rest. Measurement conditions: Average of 16 times.
*3. The error against the ideal straight line when measuring a our standard sample. Measured values may vary depending on the object to be measured.
Related Solutions
Downloads
Operation Manuals
*You can download the operating instructions from the e-mail that will be automatically returned to the e-mail address you enter in the form below.
Integrated Displacement Tilt Sensor | Operation Manuals
Software
*You can download the software from the e-mail that will be automatically returned to the e-mail address you enter in the form below.
Integrated Displacement Tilt Sensor | Software
Outline Drawing
*You can download the outline drawing from the e-mail that will be automatically returned to the e-mail address you enter in the form below.
Integrated Displacement Tilt Sensor | Outline Drawing

